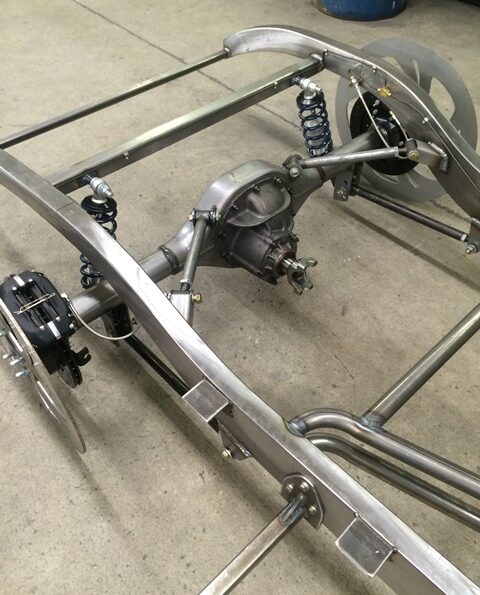
Triangulated 4 link basics
Share
There are a million ways to iron out and set up a triangulated four link, so Southern Chassis Works have broken it down and trawled the best info to make it easier to get it set and working first go.
Now setting up a triangulated 4-link suspension requires careful planning, precise measurements, and attention to detail to ensure optimal performance and safety. Here’s a step-by-step guide to help you through the process:
1. **Gather Necessary Components and Tools:**
- Triangulated 4-link kit (including upper and lower links, brackets, bushings/heim joints)
- Measuring tools (tape measure, angle finder, plumb bob)
- Welding equipment (MIG or TIG)
- Angle grinder or other cutting tools
- Jack stands and a floor jack
- Coilovers or airbags (if applicable)
- Safety gear (gloves, goggles, etc.)
2. **Planning and Preparation:**
- **Vehicle Stance**: Determine the desired ride height and stance of the vehicle. This will influence the positioning of the links.
- **Pinion Angle**: Decide on the ideal pinion angle for your drivetrain setup. A common starting point is to match the angle of the transmission output shaft.
- **Axle Placement**: Ensure the axle is centered and square within the chassis.
3. **Positioning the Lower Links:**
- **Mounting Points on the Chassis**: Locate the mounting points for the lower links on the chassis. These are usually parallel to the ground and should be positioned so that the lower links are parallel to the chassis rails when the vehicle is at ride height.
- **Axle Mounting Points**: Attach the lower link brackets to the axle housing. The lower links should be roughly parallel to the ground when viewed from the side.
4. **Positioning the Upper Links:**
- **Chassis Mounting Points**: The upper links are mounted at an angle (triangulated) on the chassis. The chassis mounting points should be higher and closer together than the lower link mounts.
- **Axle Mounting Points**: Attach the upper link brackets to the axle housing, ensuring the links angle inward towards the center of the chassis. This triangulation eliminates the need for a Panhard bar.
5. **Checking Geometry:**
- **Link Lengths**: Ensure the links are of the correct length to allow the desired articulation while maintaining proper pinion angle throughout the suspension travel.
- **Clearances**: Check for any potential clearance issues with the frame, exhaust, driveshaft, or other components during full suspension compression and droop.
6. **Welding the Brackets:**
- **Tack Welding**: Start by tack welding the brackets in place. This allows you to make adjustments if needed.
- **Final Welding**: Once everything is aligned correctly, fully weld the brackets to the axle and chassis. Ensure strong, clean welds to avoid any failures.
7. **Install Coilovers or Airbags:**
- **Positioning**: Mount the coilovers or airbags in the desired location. They should be aligned with the suspension geometry to provide even support and consistent ride quality.
- **Adjusting**: Set the initial preload and ride height using the adjusters on the coilovers or by inflating the airbags.
8. **Final Adjustments:**
- **Pinion Angle**: Fine-tune the pinion angle using the adjusters on the links.
- **Alignment**: Ensure the axle is square to the chassis and that the wheels are aligned correctly.
- **Test Fit**: Check for any binding or interference during full suspension travel.
9. **Testing:**
- **Initial Drive**: Take the vehicle for a test drive, starting with slow speeds to ensure everything is functioning correctly.
- **Adjust as Needed**: Make any necessary adjustments to the links, pinion angle, or ride height based on the vehicle's performance and handling.
10. **Final Inspection:**
- **Check All Fasteners**: After the initial test drive, check all fasteners and welds to ensure they are secure.
- **Recheck Alignment**: Confirm that the alignment is still within spec after the suspension has settled.
Setting up a triangulated 4-link suspension is a complex task that requires precision, but with careful planning and execution, it can significantly improve the handling and performance of your vehicle.
If you would like a custom length 4 link in round tube, steel fabricated, or billet aluminium arm style all vsb 14 tested and engineered please contact SCW or visit our website for details www.southernchassis.com
